If you have used Python before, chances are that you have heard of PIP. So what is it? Pip is the defacto package manager for Python packages. It allows you to install, and manage Python packages in an easy and convenient manner. PIP comes included by default in Linux systems running Python 3.4 and later. For older systems, you will need to install it. In this tutorial, we will show you how to install Pip on Ubuntu 20.04. Without much further ado, let’s dive in.
Prerequisites
Before you get started, you need an instance of Ubuntu 20.04 with a sudo user. If you don’t have one already, you can readily deploy a high-performance, fully managed cloud VPS at only $3.71.
Install PIP on Ubuntu 20.04
Python ships with 2 distinct flavors: Python2 and Python3 which is the latest and comes bundled in Ubuntu 20.04. Python2 can be installed thanks to the universe repository, but Python3 is the modern standard nowadays and users are encouraged to install it or upgrade from Python2. In this guide, we will demonstrate how you can install pip for both Python3 and Python2.
Install pip for Python3
Pip3 can be installed on Ubuntu using the APT package manager. To start off, update the package lists as shown.
$ sudo apt update
To install pip3 run the command:
$ sudo apt install python3-pip

The command installs pip3 and all the Python libraries and dependencies. Upon completion of the installation, verify that pip3 is installed by running the command:
$ pip3 --version
You should get output similar to what we have.

Perfect! pip3 is now installed, Let’s now see how you can install pip for Python 2.
Install pip for Python2
The Ubuntu repositories do not include pip for Python2. The only way you can install pip is by using the get-pip.py script which is included in the universe repository.
Therefore, begin by enabling the universe repository as shown:
$ sudo add-apt-repository universe
Next, update the Ubuntu package list and install Python2 as follows:
$ sudo apt update

$ sudo apt install python2

You can check the version of Python2 by invoking the command:
$ python2 --version
You should some output similar to what we have here.

Next, proceed to download the get-pip.py script as shown.
$ curl https://bootstrap.pypa.io/get-pip.py --output get-pip.py

Finally, execute the script using Python2 to install pip as shown:
$ sudo python2 get-pip.py

Once the installation is complete, you can verify the version of pip2 by running:

How to use pip
Now that we have pip installed. Let’s go a bit further and see how you can use it to manage Python packages.
To install a package, use the syntax:
$ pip3 install package_name
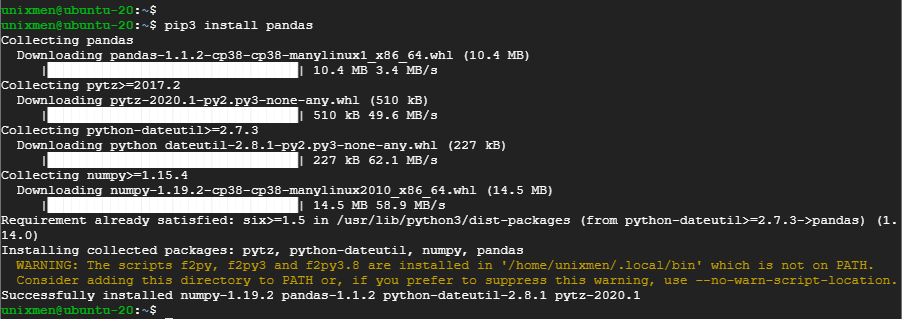
For example, to install the pandas library package which is used for data analysis and mining, run the command:
$ pip3 install pandas

To install packages from a requirements.txt file run:
$ pip3 -r install requirements.txt
To uninstall a package run:
$ pip3 uninstall package_name
Those are just a few examples of how you can use the pip package manager to manage Python packages.
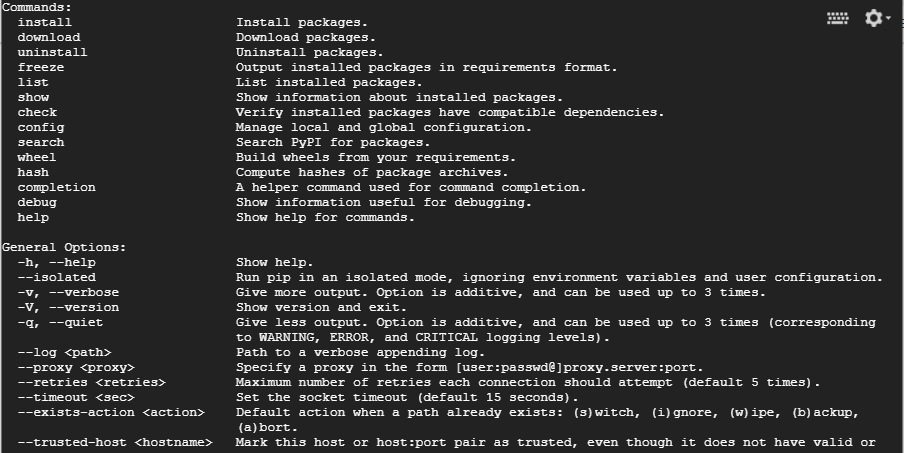
For assistance on more command options and usage run:
$ pip3 --help

And this brings an end to our article today on how you can install pip on Ubuntu 20.04. Your input is highly welcome.

