Docker is a free and opensource containerization platform that allows developers to develop and deploy applications in isolated environments called containers. Containers ship with their own libraries and dependencies that make it possible to develop standardized code in complete isolation from the host system. In this guide, you will learn how to install and run Docker on Ubuntu 20.04 LTS.
Requirements
To get started, you require an instance of Ubuntu 20.04 LTS with a sudo user. If you don’t have, you can deploy a fully managed VPS or cloud server starting at only $3.71.
Step 1: Install docker
To get started with the installation of Docker, log in to your Ubuntu 20.04 LTS and first update the package lists as shown:
$ sudo apt update
Next, install the dependencies that are required by Docker to function as expected:
$ sudo apt install apt-transport-https ca-certificates curl gnupg-agent software-properties-common
Thereafter, add the GPG key as shown:
$ curl -fsSL https://download.docker.com/linux/ubuntu/gpg | sudo apt-key add -
Next, add the Docker repository as shown:
$ sudo add-apt-repository "deb [arch=amd64] https://download.docker.com/linux/ubuntu $(lsb_release -cs) stable"
Once you are done adding the repository, it’s time now to install Docker. There are 2 ways you can go about this:
- Install the most recent version of Docker.
- Install the Docker version of your choice.
How to install the most recent version of docker
To install the latest version of Docker on your system, run the commands below:
$ sudo apt update

$ sudo apt install docker-ce docker-ce-cli containerd.io

To check the version of Docker that you have installed, run the command:
$ docker --version

How to install docker version of your choice
By default, Ubuntu 20.04 systems come with Docker in their repositories. It is, however, important to take note of the Docker version you are using and update it from the official Docker repositories.
To check available versions that are available from docker repository, run the command:
$ apt list -a docker-ce

The version of docker packages available for download is indicated in the second column. To install a specific version, simply use the syntax below replacing <VERSION> with the actual docker version.
$ sudo apt install docker-ce=<VERSION> docker-ce-cli=<VERSION> containerd.io
For example to install docker version 5:19.03.11~3-0~ubuntu-focal run the command:
$ sudo apt install docker-ce=5:19.03.11~3-0~ubuntu-focal docker-ce-cli=5:19.03.11~3-0~ubuntu-focal containerd.io
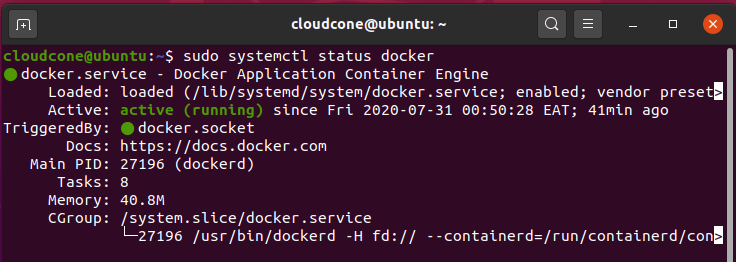
Once you have installed Docker, you can confirm its status by running the command:
$ sudo systemctl status docker

The output above confirms that docker is installed and is running as expected. If for some reason docker is not running, you can start it by running:
$ sudo systemctl start docker
To stop docker service execute the command:
$ sudo systemctl stop docker
If you wish to update Docker every time new packages are released, run the command:
$ sudo apt update -y && sudo apt upgrade -y
To prevent Docker from being updated and maintain using the current version, run the command:
$ sudo apt-mark hold docker-ce
Step 2: Run docker
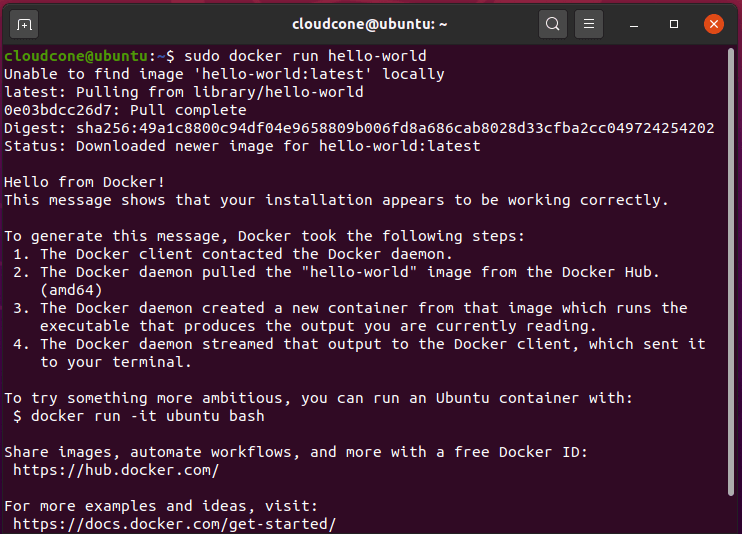
To verify that docker was properly installed, we are going to pull and run a sample image from Docker hub. The image name is hello-world and when run, it spawns and runs a container that prints the message hello from Docker ! on the terminal. The command will be:
$ docker run hello-world
Conclusion
This concludes our topic on how to install and run docker on Ubuntu 20.04. It’s our hope that you have the basics of installing docker on your system and getting it up and running.


