A few days back, I tried to update my Ubuntu 20.04 PC and I run into an error ‘the repository is not signed‘ and I could not go past that. Other times, you may happen upon the error ‘The repository does not have a release file‘ when trying to add a third-party repository. If you have encountered such errors before and got stuck, don’t lose your sleep. In this guide, we will focus on how to resolve such errors on Ubuntu 20.04. Without much further ado, let’s dive right in.
Fix the repository is not signed error on Ubuntu
Before we delve into the root cause of this error. Let’s briefly mention about PPAs. What is it? PPA (Personal Package Archive) is a platform that allows developers to make available their own repositories and distribute their applications.
Why use PPAs instead of relying on Ubuntu’s main repositories?
This is a question that you might be asking given that each Ubuntu version comes with its own set of repositories which provide a wide selection of software packages. In fact, Ubuntu has over 47,000 software packages provided by the 4 main repositories. Each version of Ubuntu comes with 4 main repositories:
1) Main – Maintained by Canonical and provides free and opensource software.
2) Universe – Maintained by the Community and provides free and opensource software.
3) Restricted – Contains proprietary drivers for additional devices.
4) Multiverse – Contains copyright-restricted software.
Ubuntu’s APT package manager stores a list of repositories in the /etc/apt/sources.list file.
Essentially, Ubuntu has control over which software packages and versions that you will get on your system. The problem arises when a developer releases their own version of the software. Usually, Ubuntu will not make it available immediately in their repositories. They carry out multiple tests to check the compatibility and stability of the application. This may take several months for the application to be made available and certainly, not everyone is willing to wait that long to get the application.
Similarly, when a developer wishes their application to be included in Ubuntu’s official repositories, Ubuntu takes time before making the final decision on whether or not to include the application in its official repositories.
And this is where PPA comes in.
Installing software applications using PPAs.
Thankfully, Ubuntu provides Launchpad, which is a platform that allows developers to create their own repositories. As an end-user, you can add the PPA repo to your sources.list file and upon updating your Ubuntu system, your system will then know the availability of the software and allow you to install it using the APT package manager.
For example, to install FFmpeg4, you would add the ffmpeg4 launchpad PPA as follows:
$ sudo add-apt-repository ppa:jonathonf/ffmpeg-4
Thereafter, you will be prompted to hit the ‘ENTER’ button to continue with adding the PPA.
Press [ENTER] to continue or Ctrl-c to cancel adding it.Once the PPA is added, update your system and install the application as shown.
$ sudo apt update

$ sudo apt install ffmpeg4
The issue with third-party PPAs
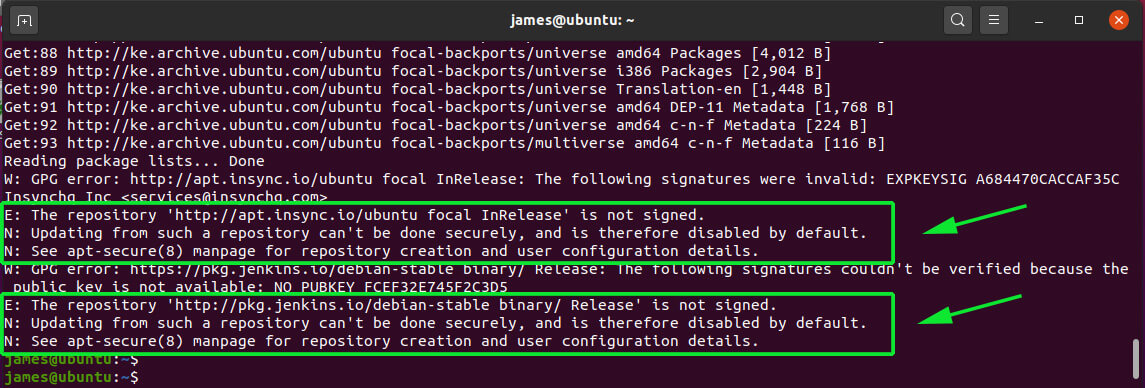
Sometimes, some third-party PPAs can wreak havoc in your system and you may get warnings on the terminal such as the ones indicated below while updating Ubuntu.

Other times, you may encounter the ‘The repository does not have a release file‘ error such as the one shown below.
E: The repository 'http://ppa.launchpad.net/niko2040/e19/ubuntu focal Release' does not have a Release file.
N: Updating from such a repository can't be done securely, and is therefore disabled by default.
N: See apt-secure(8) manpage for repository creation and user configuration details.
Resolving the ‘repository is not signed’ issue
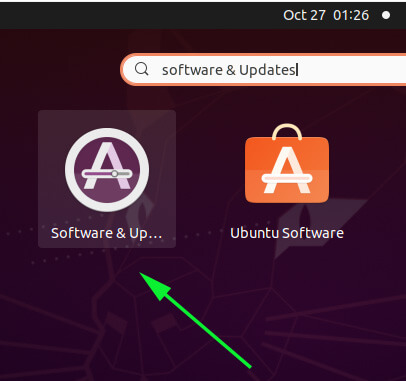
To resolve this error, you need to delete the troublesome PPA from your the repository on your system. To achieve this, launch the ‘Software and Updates’ tool as shown.

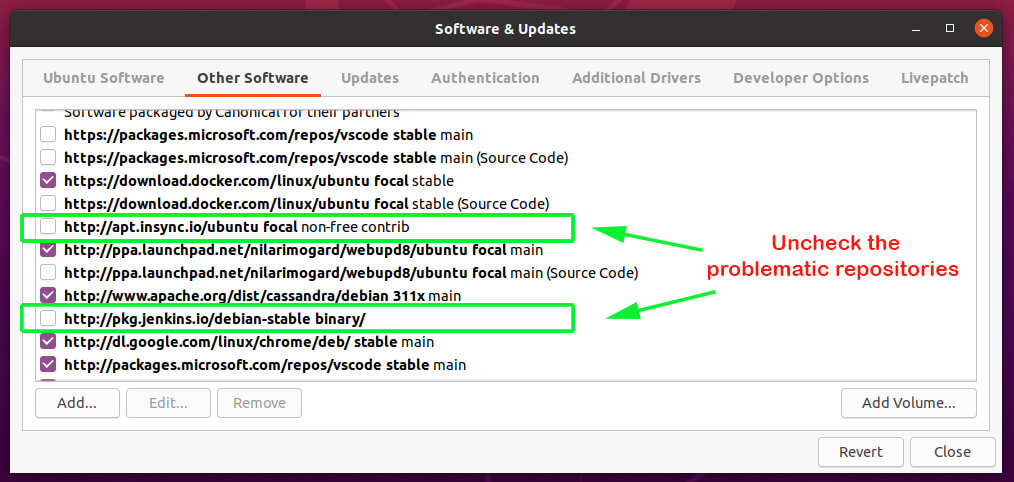
On the ‘Software & Updates‘ window, click on the ‘Other Software‘ tab. Next, click to uncheck and purge the problematic PPAs.

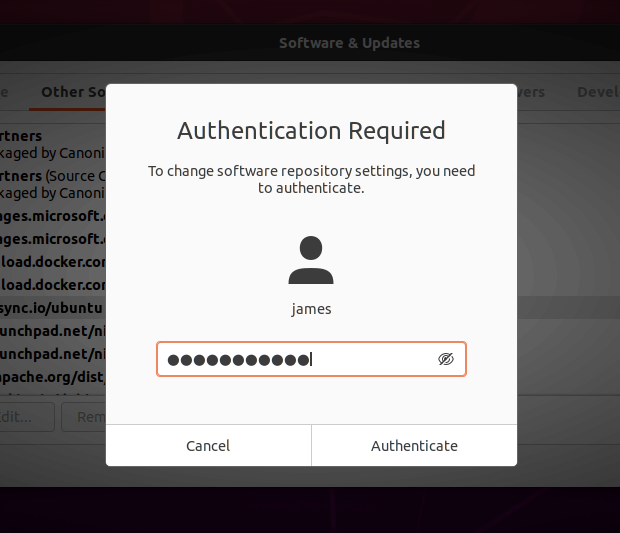
Provide your password to authenticate the removal of the repositories in question.

If you are using the terminal, you can , use the syntax:
$ sudo add-apt-repository --remove ppa:name/here
For example
$ sudo add-apt-repository --remove ppa:niko2040/el19
After removing the troublesome PPAs, you should now be able to update/upgrade your system and manage your packages with ease. That’s it, guys. In this guide, we have shown you how to resolve the ‘the repository is not signed’ error on Ubuntu. I do hope that this guide was beneficial.

