LAMP is a popular opensource stack that stands for Linux Apache MySQL/MariaDB and PHP. It’s mostly used by front-end and back-end developers to test and host a website. The stack comprises of 3 components. First, we have Apache, which is a web server. Then we have Mariadb, which is a fork of MySQL and PHP which is a server-side scripting language. All the components are absolutely free and opensource. In this guide, we will touch base on how to install LAMP on Debian 10 server. At the time of penning this article, the latest release of Debian 10 is Debian 10.6. Without much further ado, let us proceed and install the software stack.
Prerequisites
Before you get started, ensure that you have an instance of Debian 10 running. If you don’t have a physical instance, don’t you worry. You can easily spin up a fully-managed VPS starting at only $3.71 per month.
Step 1: Install Apache webserver
To get started, log into your server instance and update the package lists as shown:
$ sudo apt update
Once your packages are up to date, install the Apache webserver as shown:
$ sudo apt install apache2 apache2-utils
Once installed, verify the status of apache to see if it is running, by executing the command:
$ sudo systemctl status apache2

The snippet attached confirms that the Apache webserver is up and running. If apache is not running, you can start and enable it on boot using the commands:
$ sudo systemctl start apache2

$ sudo systemctl enable apache2

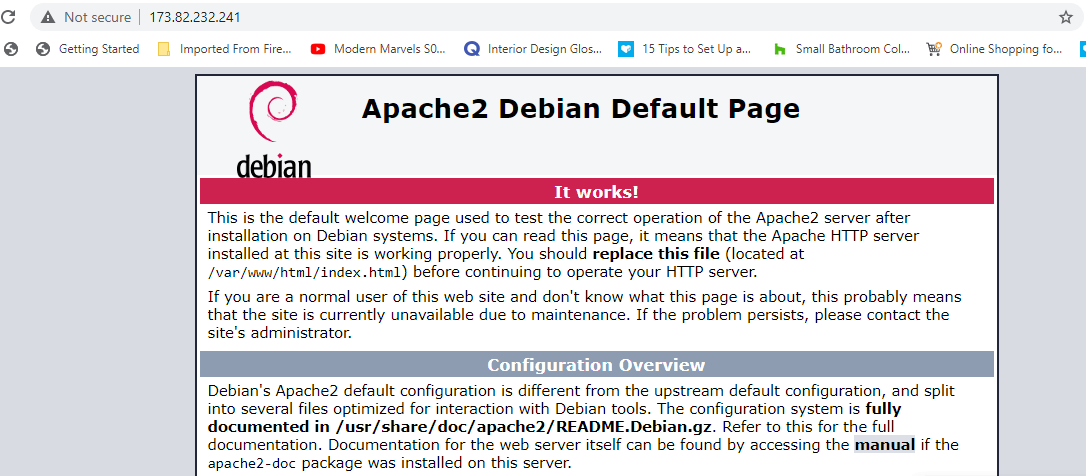
Additionally, you can browse your server’s IP address and you will see the welcome page below.
http://server-ip
NOTE: If you have UFW firewall running, allow port 80 which is the HTTP port that Apache listens to as shown.
$ sudo ufw allow 80/tcp

$ sudo ufw reload
Step 2: Install MariaDB database engine
The other component we need to install is the MariaDB database server. MariaDB is a drop-in replacement for MySQL. It provides better performance and advantages such as:
- Faster and safer replication than MySQL.
- More storage engines than MySQL
- MariaDB supports up to 200,000 connections thanks to its advanced thread pool.
- MariaDB offers advanced Galera clustering technology.
Those are just a few highlights of what makes MariaDb the preferred choice over MySQL. To install MaroaDB on Debian 10, execute the command:
$ sudo apt install mariadb-server mariadb-client
Once the installation is complete, check whether the database server is running by issuing the command;
$ sudo systemctl status mariadb

If not running, you can start it and enable it to start on boot by running:
$ sudo systemctl start mariadb

$ sudo systemctl enable mariadb

The default settings for MariaDB, just like MySQL, are weak and an attacker or anonymous user can easily gain access without authentication. Therefore, we need to harden our Database instance.
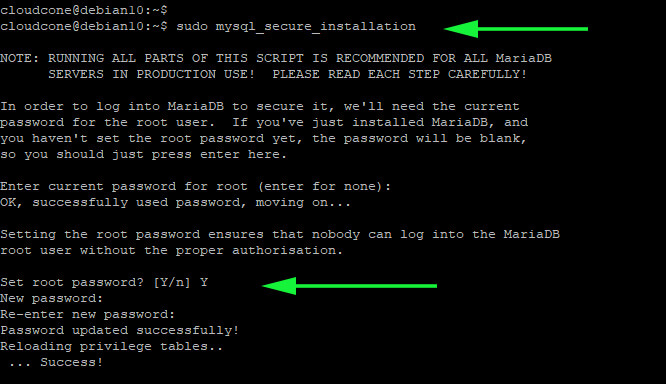
$ sudo mysql_secure_installation
First, you will be required to provide the root password. If none is configured or set, you need to set one your MariaDB database and confirm it.
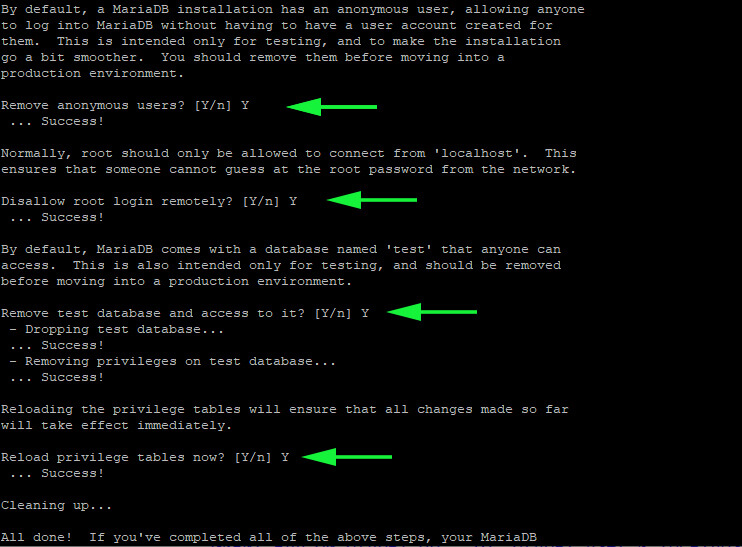
Thereafter, you will be required to respond to an array of questions. To enforce the recommended settings for your Database server, press ‘y‘ and hit ENTER. This is going to remove anonymous users, prevent a remote user from logging in as root and remove the test database.
When all is done, you can now log in to the MariaDB database as shown:
$ sudo mysql -u root -p
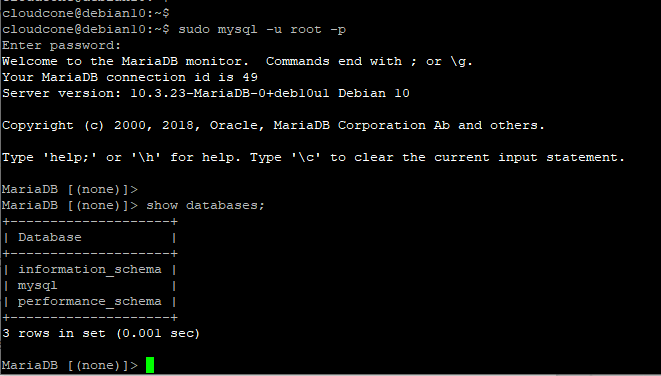
To exit from the database engine, execute:
exit;
Step 3: Install PHP 7.3
The last component remaining is PHP. For this guide, we will install PHP 7.3 which is quite stable for most PHP applications. Therefore, to install PHP 7.3, execute the command:
$ sudo apt install php7.3 libapache2-mod-php7.3 php7.3-mysql php-common php7.3-cli
php7.3-common php7.3-json php7.3-opcache php7.3-readline
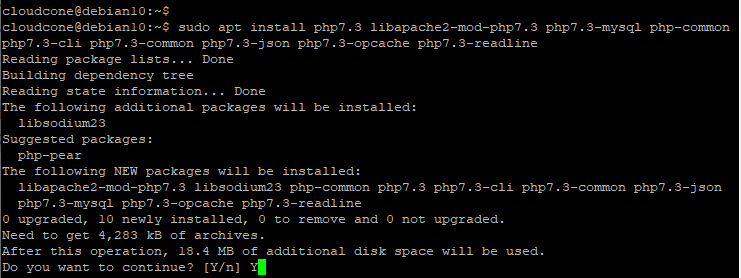
For PHP to work with Apache web server, you need to enable the Apache PHP 7.3 module and restart Apache web server as shown.
$ sudo a2enmod php7.3

$ sudo systemctl restart apache2
To verify the version of PHP installed, run:
$ php --version

Additionally, you can test whether PHP is working with Apache on a browser by creating an info.php file in the webroot directory as shown.
$ sudo vim /var/www/html/info.php
Add the following lines:
<?php
 phpinfo();
 ?>
Save and exit.
Then head over to your browser and browse the address as shown:
http://server-ip/info.php
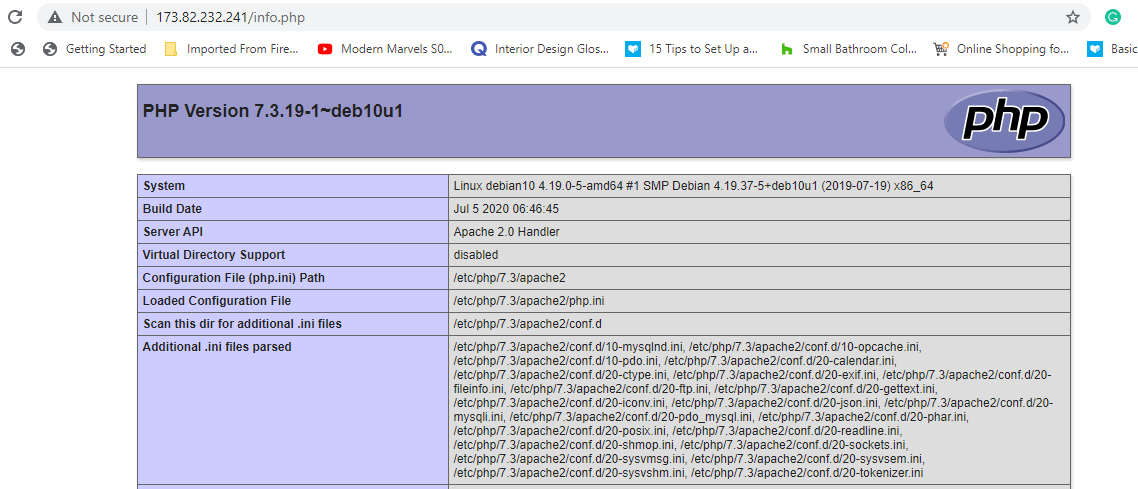
Great! Up until now, you have installed all the components of the LAMP stack. However, you need to delete the info.php file to prevent attackers from gathering information about your server.
$ sudo rm /var/www/html/info.php
Running PHP-FPM with Apache
While we have all the components of a LAMP stack in place, sometimes, you may be required to execute PHP code with PHP_FPM. Therefore, first, disable the Apache PHP7.3 module.
$ sudo a2dismod php7.3
Then Install PHP-FPM on Debian as shown.
$ sudo apt install php7.3-fpm
Next, enable proxy_fcgi and setenvif module.
$ sudo a2enmod proxy_fcgi setenvif
Also, you need to enable the /etc/apache2/conf-available/php7.3-fpm.conf configuration file.
$ sudo a2enconf php7.3-fpm
For the changes to take place, restart Apache webserver.
$ sudo systemctl restart apache2
Conclusion
In this guide, you learned how to install LAMP stack on Debian 10. You can now host your dynamic website/blog an invite your family and friends to have a glance.

