
According to a recent announcement by Canonical, Ubuntu 18.04 LTS support has been extended to 10 years! This means you can use Ubuntu 18.04 will full security and package updates till 2028. How cool! In this article, we will take a look at How to install Ubuntu Server 18.04.
Minimum installation requirements
Before getting started, ensure you have the following in your checklist
- 2 GB RAM
- 2 Ghz Dual Core processor
- 25 GB of Hard Disk space
- Installation Media ( Either DVD / USB drive)
- Internet Access for downloading necessary updates
To get started, insert the DVD into the DVD ROM or the bootable USB drive into the USB port and reboot your system.
Be sure to change the boot order in the BIOS settings so that your installation media is first in Boot priority.
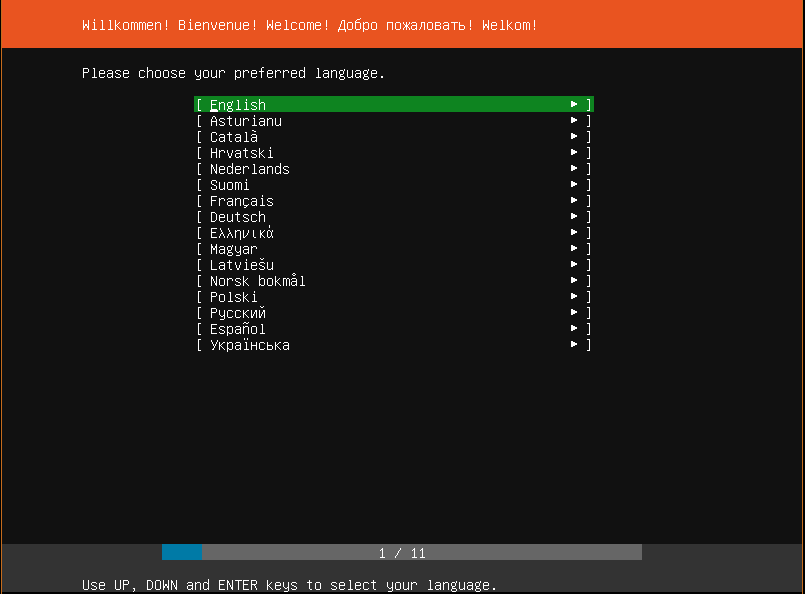
Step 1. Choose the Language
Once the system starts, you ‘ll be presented with this screen. Choose your preferred language and Hit ENTER.
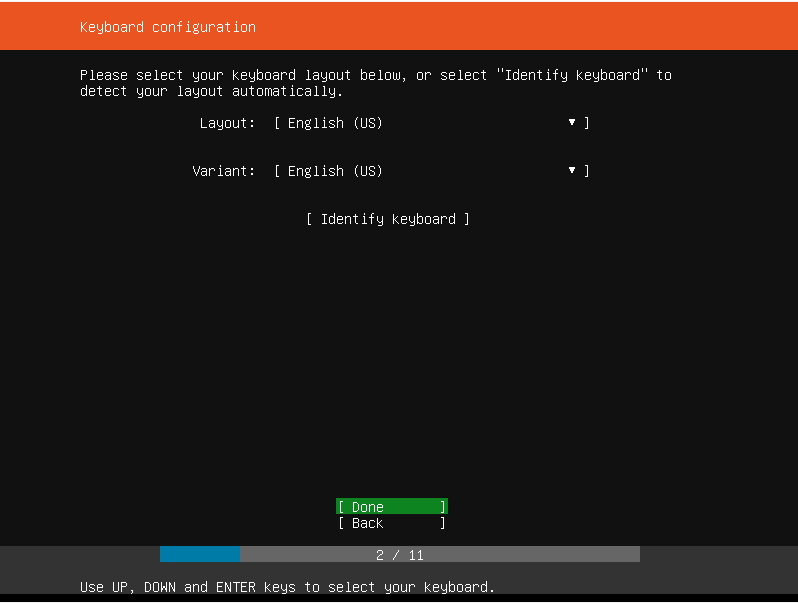
Step 2. Select Keyboard Layout
The next screen will prompt you to select the keyboard layout of your choice. After making your choice, hit ENTER.
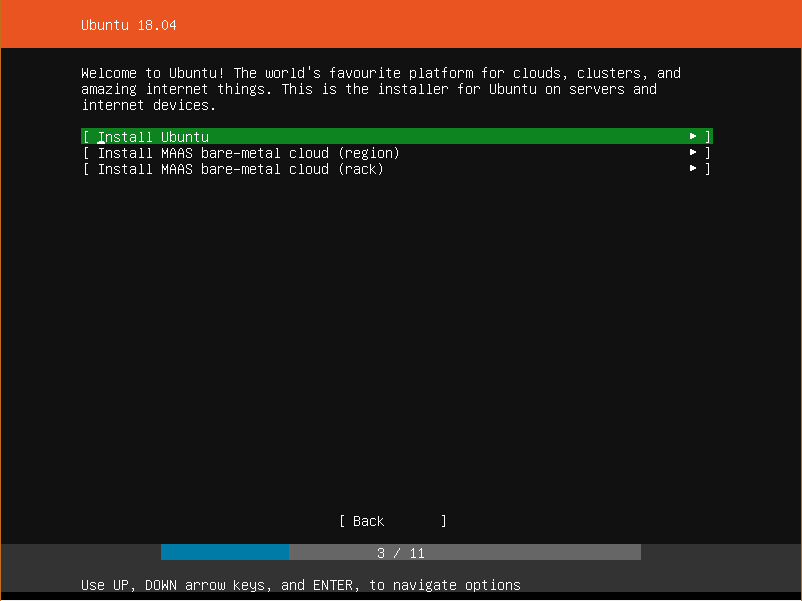
Step 3. Select Ubuntu or MAAS (Metal As A Service)
You will then have a list of various platforms to install Ubuntu. You can select the first choice which is to install Ubuntu normally on a PC or Install MAAS which facilitates cloud provisioning for Physical Servers.
Select the first choice and hit ENTER.
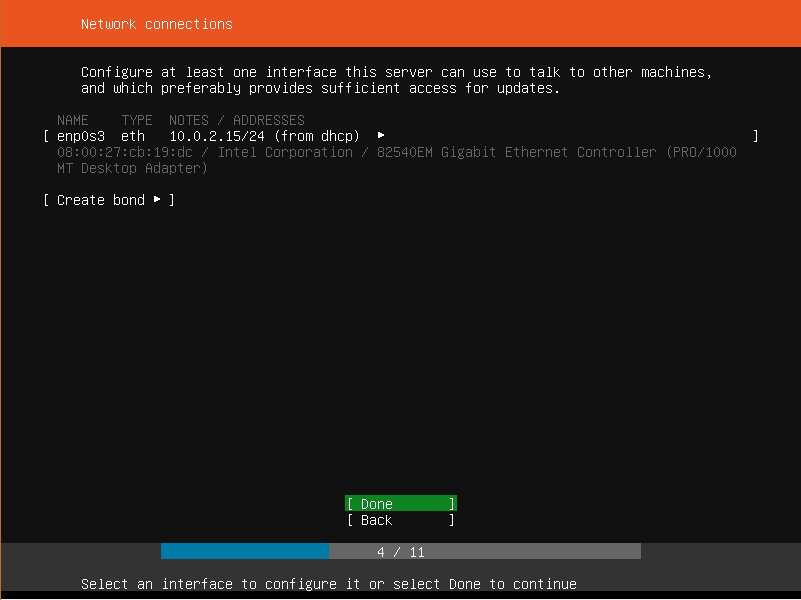
Step 4. Network Settings
At this point, select the network adapter and accept the IP address if your system is in a network with a DHCP server. Alternatively, you can choose to manually configure the IP address. In this example, the server has obtained IP 10.0.2.15 from a DHCP server using the network adapter enp0s3
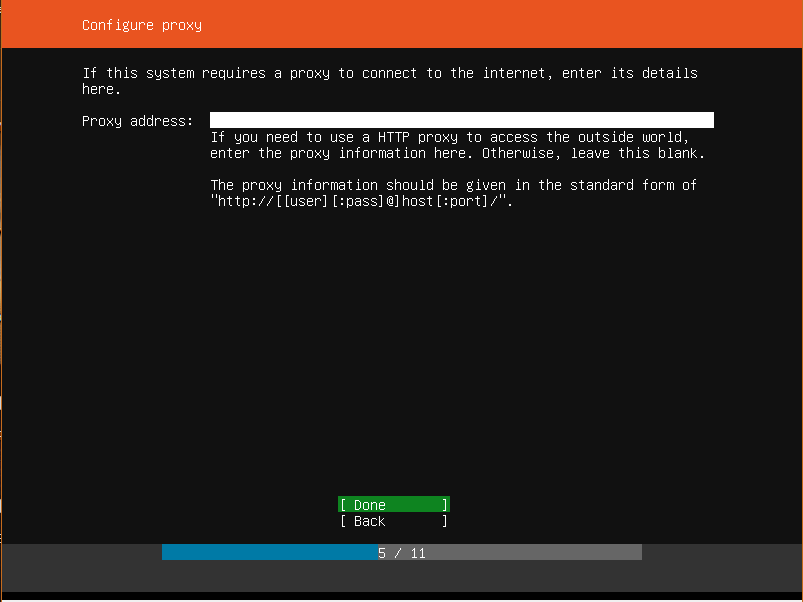
Step 5. Proxy Settings
The next screen will require you to input your proxy server address. If none is available, Hit ENTER to move to the next step
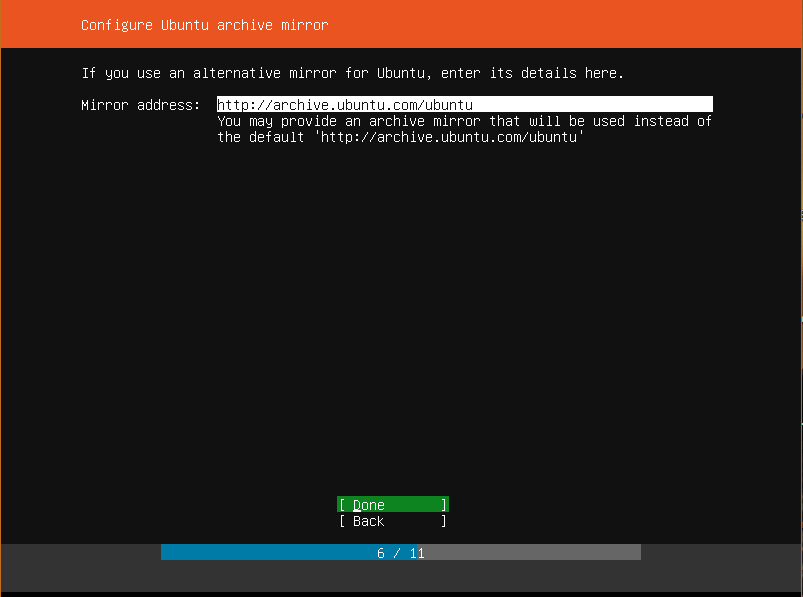
Step 6. Select network mirror
You can leave the default mirror selected or if you wish, you can change to your preferred choice.
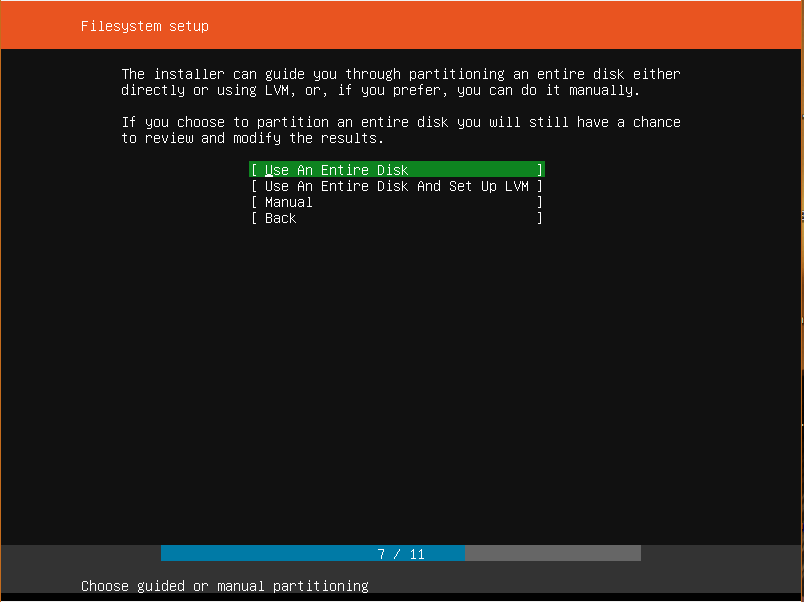
Step 7. Hard Disk Setup
This section prompts you on how to use your hard disk during the installation. You can choose to use the entire disk if no other operating system is installed or you can opt to configure manually and make a few adjustments.
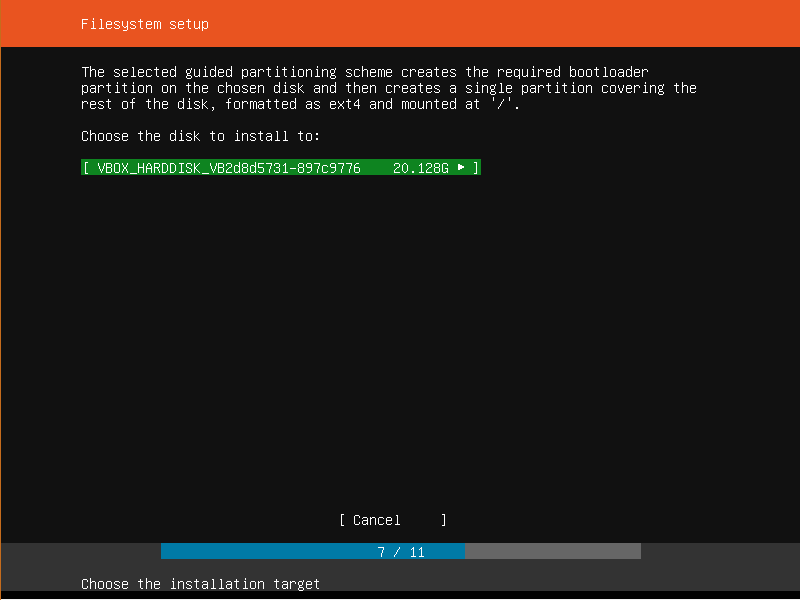
Step 8. Choose hard disk to install to
Next, select the hard disk you are going to install Ubuntu server 18.04 on. In this case, I’m using VirtualBox to install Ubuntu server 18.04.
If you have multiple hard drives, they will be listed for you to select.
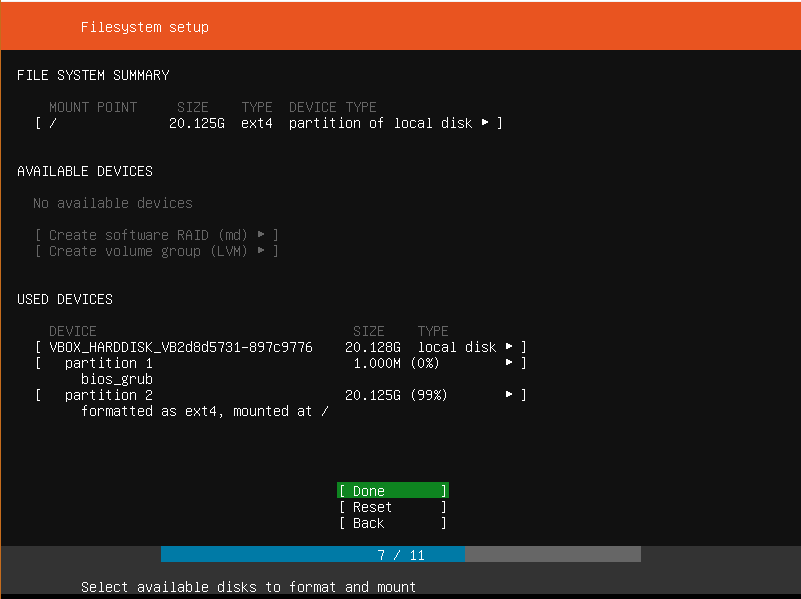
Step 9. File System Summary
Verify that everything is OK and click done.
If you noticed that you made a mistake and need to make further adjustments, hit ‘BACK’.
If you want to start all over with the disk setup and partitioning, hit ‘RESET‘
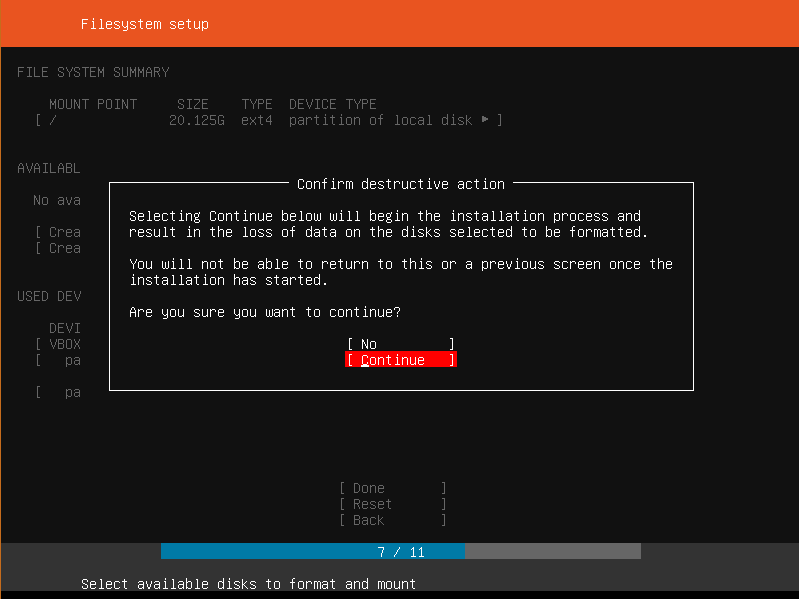
Step 10. confirm changes
To Confirm changes made to the hard disk, hit ‘CONTINUE’. This action will mark the beginning of the installation process.
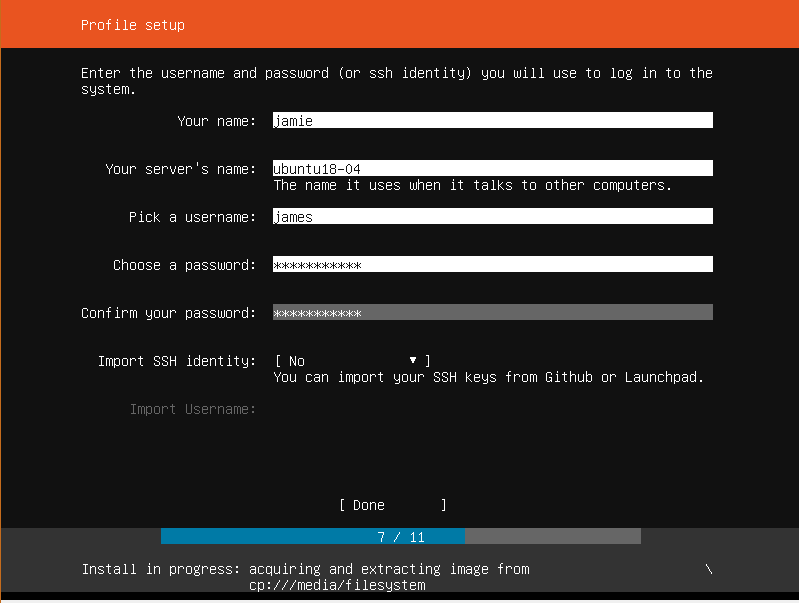
Step 11. Provide User Login credentials
Provide the necessary login credentials and hit ‘DONE‘
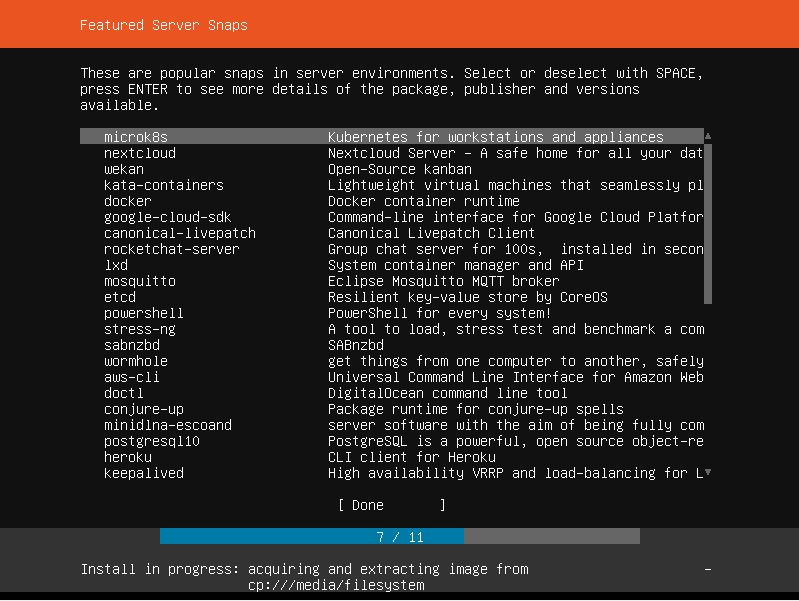
Step 12. Select Server snaps
This is a new step in the installation of Ubuntu Server. This step allows you to choose from a list of selected Server snaps. What this means is that you can choose to have a pre-configured server. some of the choices include
- Next cloud
- Docker
- Canonical Live patch
- Kubernetes
Select your preferred choice, or if you do not wish to have any of them, simply hit ENTER.
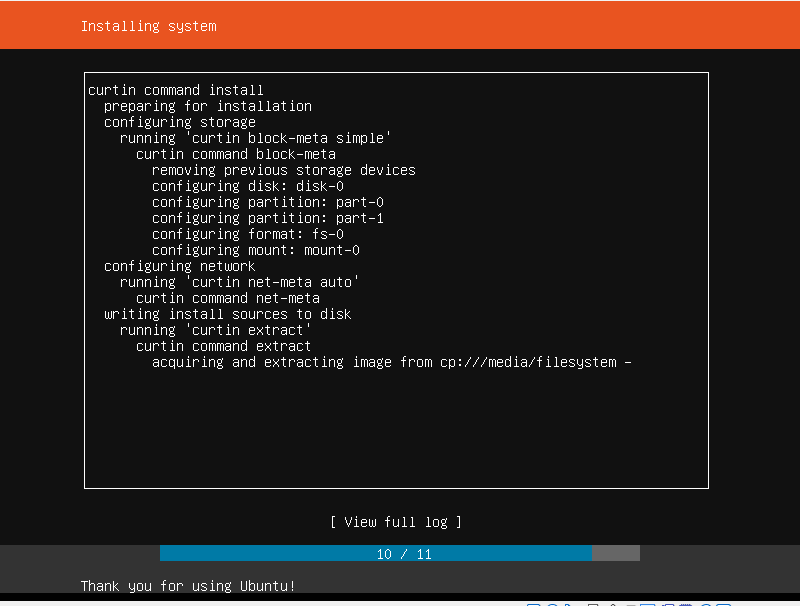
The installation process will begin. This will take about 10 minutes although it also depends on the RAM and CPU of your server.
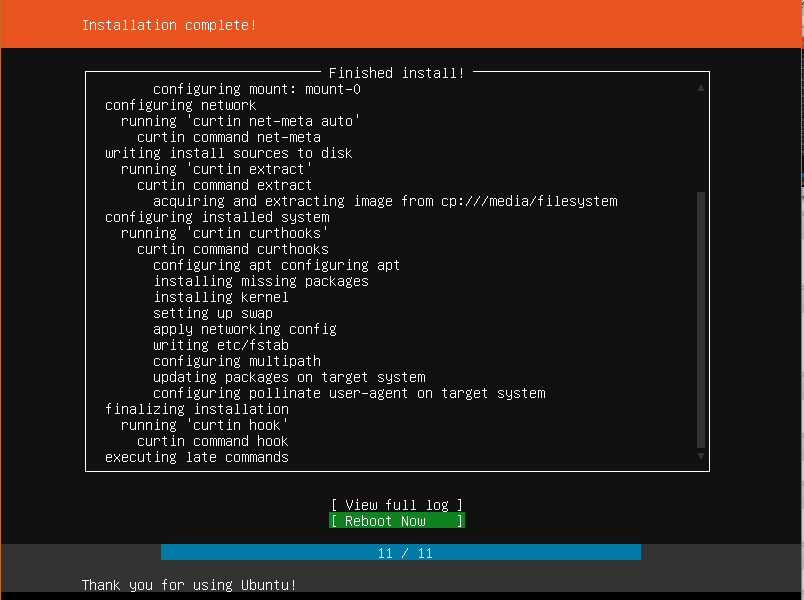
Step 13. Complete the Installation
Finally, the installation will wrap up and you will be prompted to reboot your server! Hit ‘REBOOT‘ and remove the installation media. VirtualBox will automatically do this for you.
Step 13. Log in to the server
A black console will appear prompting for your username and password. Provide the credentials you created earlier.
Thereafter, update and upgrade the repositories to their latest definitions.
sudo su
apt update && apt upgrade
Conclusion
We have finally installed, updated and upgraded our Ubuntu server 18.04! Fanstatic. In our next tutorial, we will look at how you can install lightweight desktop environments for our server. This will be beneficial for those who love the look and feel of the GUI environment.
Thanks for your time and keep it here for more useful tutorials!