
Django is a feature-rich Python web framework used to develop dynamic websites and web applications. With Django, you can easily create Python web applications and count on the framework to work magic!
In this tutorial, we will show you how to install Django on Debian 9 stretch. Later, we will show you how you can start your brand new project as a foundation for your site.
Before we begin, ensure that you have a non-root user with root privileges to your Debian 9 system.
Different ways of installing Django
There are a couple of ways which you can use to install Django on Debian 9. The preferred way will be dependent on what your needs are and how you would like to configure your development environment. Below are some of the ways you can use
- Global install from software Packages: Official Debian repositories contain Django packages that can easily be installed with apt package Manager. This may be an easy and straightforward way, however, the drawback is that the version installed from repositories may not be the latest version.
- Global Install through pip: pip is a Python package manager. It is used for installing and managing Python Software packages. Similarly, pip can be used to install Django. However, global installations are less flexible.
- Development Version install through git: You can get the latest code from the git repository to install the latest version in place of the stable release. The latest development gives you the latest features and fixes and can be done both locally or globally.
- Installation through pip in a virtualenv: The Python virtualenv package allows you to install Django in a project directory without affecting the system-level packages. This enables you to make per-project customizations as well as packages easily. Furthermore, Virtual environments provide the most flexibility.
Global Install Django from software Packages
The process of installing Django from Debian repositories is very straightforward. First, let’s update the local package index
# sudo apt update
Next, select the Python version that you prefer to use with Django. For Python 2, run:
# sudo apt install python-django
If you prefer using Python 3 run
# sudo apt install python3-django
To verify the successful installation of Django run
django-admin --version
Output
1.11.13
This shows a successful installation of Django. However, be adviced that your version of Django may differ slightly from the one indicated as developers keep on rolling out newer versions.
Global Install Django through pip
If you desire to install Django globally, using pip is a better option. To get started, refresh your apt sources list
# sudo apt update
Thereafter, you can choose to install pip with either python2 or python3
Python2
To install pip with Python2 run
# sudo apt install python-pip
Now that we have pip installed, we can install Django by running
sudo pip install django
Later, verify the installation
django-admin --version
Output
1.11.13
Python3
To install pip with Python3 run
# sudo apt install python3-pip
Next, use the pip package manager to install Django
sudo pip3 install django
To verify that the installation was successful, run
django-admin --version
Output
1.11.13
Installing pip through a virtualenv
One of the most flexible ways of installing Django on your Linux system is using the virtualenv tool. The tool allows you to create a virtual environment that will give you the freedom of installing any python packages without affecting the rest of the system. The virtual environment gives you the leeway of selecting Python packages on a per-project basis without minding much about other projects’ requirements.
We are going to start by installing pip from Debian repositories. But first, let’s update the local packages
# sudo apt update
The packages needed to install Django differ depending on the Python version you desire to use for your projects. Let’s see the installation of Django in a virtual environment using either Python2 or Python3.
Python2
First, install pip globally using the following command
# sudo apt-get install python-pip
Once pip is installed, run the following command to install the virtual environment
# sudo pip install virtualenv
Now that we have installed the virtual environment, the next step is to start a project.
To do that, we are going to first create a new directory and navigate into it. we can achieve this by running a single command
# mkdir project1 && cd project1
Within the project directory, create a virtual environment by running
# virtualenv venv
This is going to install a stand-alone version of Python, as well as pip, into an isolated directory structure within your project directory.

In this example, our virtual environment is called venv. Feel free to give it a name of your choice
A directory will be created with the name you select, which will hold the file hierarchy where your packages will be installed. These packages can be verified using the ls command
# ls
Output
# bin include lib local
Let us now activate our virtual environment
# source venv/bin/activate
If you are keen enough, you’ll see that the prompt has changed to reflect that we are in a virtual environment. This is depicted by the (venv) prefix at the beginning of the line
(venv) root@django-1:/home/debian/project1#
![]()
In our new virtual environment, we can now use pip package manager to install Django. No need for using sudo since we are installing locally.
# pip install django
Output
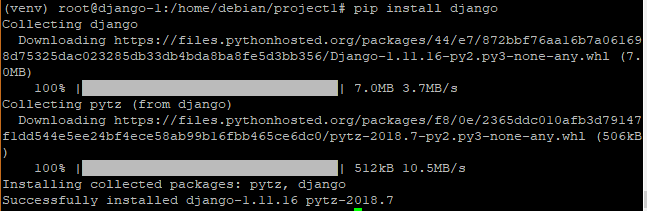
you can verify the installation by running
(env) # django-admin --version
Output
1.11.16
To exit the virtual environment, issue the deactivate command
(env) deactivate
This should revert the prompt to conventional display
To get back to your virtual environment, run this command again where venv is the name given to the virtual environment
# source venv/bin/activate
Python3
Like seen with Python2 , the first step is to install pipi globally using the command below
# sudo apt install python3-pip

Next, using the pip package manager, install the virtualenv python package
# sudo pip3 install virtualenv
Thereafter, create a virtual environment to accommodate the packages for the new projects and navigate into it with one single command
# mkdir project1 && cd project1
Within the project directory, create a virtual environment
# virtualenv venv
This installs a stand-alone version of python and pip as well into an isolated directory structure within the directory’s project. A directory as specified, venv file will contain the hierarchy where your packages will be installed.
To activate the virtual environment run
# source venv/bin/activate
The command prompt should now be prefixed with the name of the virtual environment assigned, in this case, it’ll look like
(venv)username@hostname
Next , use pip to install Django
(venv) # pip install django
Note that even though we are using Python3, we are not using pip3 but pip. In addition, we do not need to use sudo as packages are being installed globally.
Once successfully installed, check the Django version by running
( venv ) # django-admin --version
Output
1.11.16
If you wish to exit the virtual environment run,
( venv) # deactivate
To reactivate the virtual environment run the command below again
# source venv/bin/activate
Development Version Install through git
If you want a development version of Django, you will be required to download and install Django from the project’s git repository.
But first, install git and pip3 on your system using the apt package manager. pip3 will, later on, be used to install Django from the cloned repository.
NOTE:
Newer versions of Django require python3.5 and later during installation. in this case, we shall use python3.6
Python3.6
First, update the package sources list
# sudo apt update
Next install git
# sudo apt install git
To install python3.6, first, add the Felix Krull’s deadsnakes PPA
# sudo add-apt-repository ppa:deadsnakes/ppa
Next, update the system
# sudo apt upgrade
Finally, install python3.6
# sudo apt-get install python3.6
Let us now clone the Django git repository. This will have more up to date features and latest bug fixes.
You can opt to create a directory within your root directory where you are going to clone the repository.
# mkdir django-dev && cd django-dev
Now clone the Django repository into the directory youjust created in the desktop

# git clone git://github.com/django/django
Output
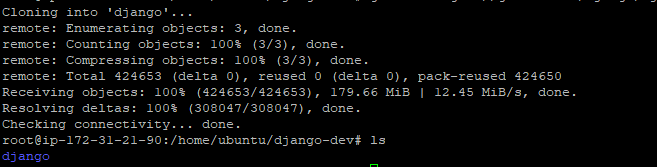
Once the repository is successfully cloned, you can now use the pip package manager to install Django as shown
# sudo pip install -e django
Output
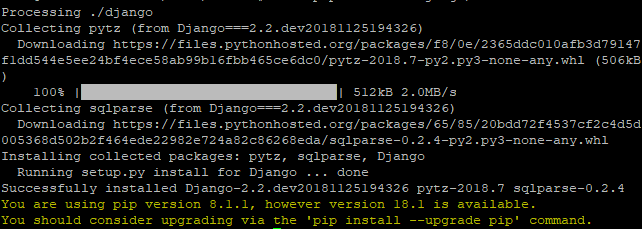
Verify that the installation was successful by running
# django-admin --version
Output
# 2.2
Great! Let us now create a sample project and test Django on a web browser
Creating a Sample project
Let us navigate into the parent project and activate our virtual environment
# cd project1
Activate the env virtual environment
# source env/bin/activate
Use the django-admin command to create a project
# django-admin startproject project_django
Next , navigate into the project directory
# cd project_django
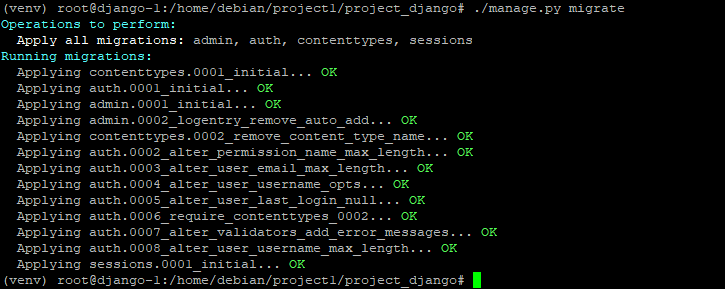
Bootstrap the database by running
# ./manage.py migrate
Output
Next. create an administrative user by running
# ./manage.py createsuperuser
You will be prompted for an email, username, and password of the user

Now, we are going to modify a few settings that will allow access to the server via a web interface
Allowing remote Hosts access to Django instance
Before we can proceed further, we need to modify one of the parameters in the settings file.
Open the settings file
# vim project_django/project_django/settings.py
Scroll down and locate the ALLOWED_HOSTS attribute. In the first section, specify the IP address of the Django server and in the second section, specify the IP address of the remote host to access the server.

Save and exit
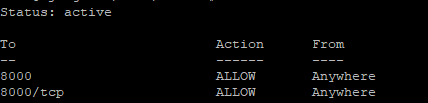
Allow port 8000 through the firewall
# ufw allow 800/tcp
Verify this by running
# ufw status
Finally, start the development server by running,
# /project_django/manage.py runserver 0.0.0.0:8000
Output

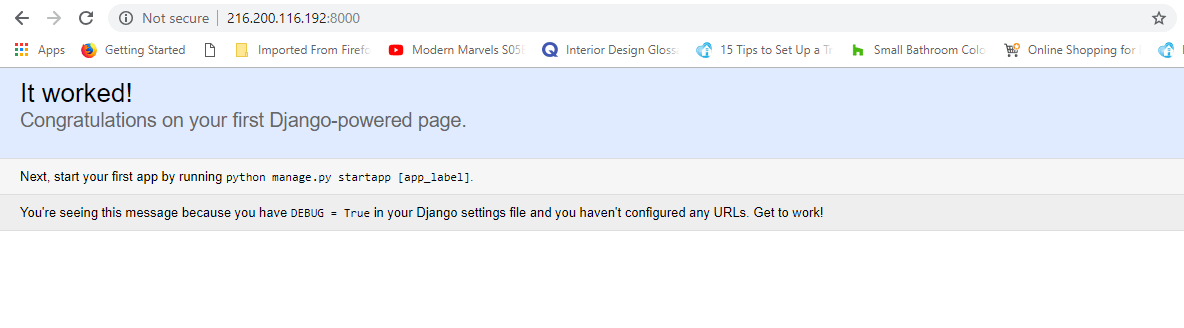
Open your web browser and visit your server’s IP address
http://ip-address:8000
You should see this page
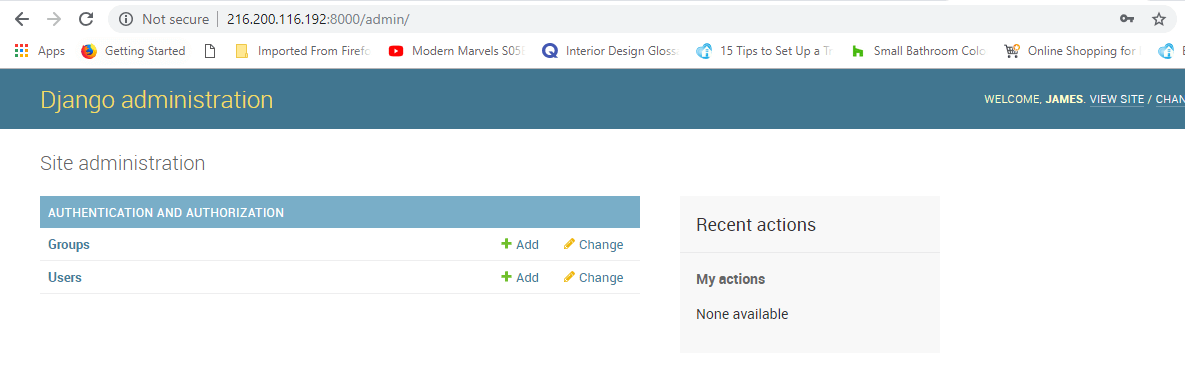
Append /admin at the end of the URL to log in to the admin panel.
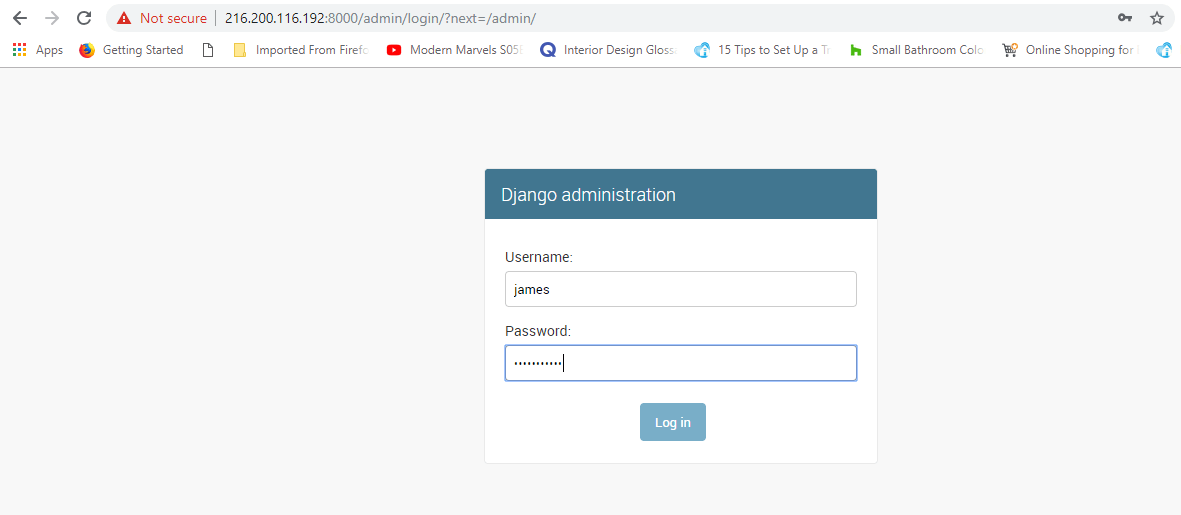
This should take you to the admin section site.
To stop the server just run CTRL + C on terminal
Congratulations! You have successfully installed Django framework on your Debian 8 server. This provides you with the capacity to deploy powerful web applications!