
Linux is a multi-user system, and more than one person can use the same system at the same time. Having only one user, which is root, can be risky. Which is why you have the ability to manage the system’s users and groups by creating and removing users.
In this article, we will talk about how to create a new user and grant that user root privileges [Sudo User] using the adduser command.
Keep in mind that only root or users with sudo privileges can use the adduser command to create new user accounts.
How to Create a New User on Linux
We first need to connect to the server with root so that we have the proper permissions. Once connected, create a new user account using the adduser command followed by the name of the user.
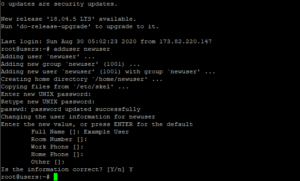
For example, to create a new user named newuser you would run:
sudo adduser newuserYou will then be asked a series of questions. The procedure will be:
- Assign and confirm a password for the new user
- Enter any additional information about the new user. This is entirely optional and can be skipped by hitting
ENTERif you don’t wish to utilize these fields. - Finally, you’ll be asked to confirm that the information you provided was correct. Enter
Yto continue.
Your new user account is now ready to use. You can log in using the password you created for that account.
Granting a User Sudo Privileges
If your new user account should have the ability to execute commands with root (administrative) privileges, you will need to give it access to sudo.
Adding the New User Account to the Sudo Group
By default, sudo on Ubuntu 18.04 systems is configured to extend full privileges to any user in the sudo group.
You can see what groups your new user is in with the groups command:
groups newuser
newuser : newuser
A new user is only in their own group which adduser creates along with the user profile. A user and its own group share the same name. In order to add the user to a new group, we can use the usermod command:
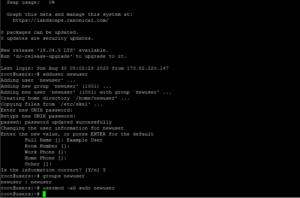
usermod -aG sudo newuserThe -aG option here tells usermod to add the user to the listed groups.
Now, your new user account is able to execute commands with administrative privileges.
To verify this, you can sign in to the user account and execute commands as your regular user by typing commands as normal:
apt-get updateYou can execute the same command with administrative privileges by typing sudo and then the command:
sudo apt-get update
You will be prompted to enter the password of the regular user account you are signed in as.

Now, your new user account is ready-to-go with sudo access. You may log into the server with this new account and use sudo when necessary.